Examining and Modifying the Program State
This chapter describes how to examine and modify the program state by using the following windows:
Variable and Watch windows
Windows that display variables come in several different varieties:
- Locals
- File Variables
- Watches
- Variable
They're collectively called variable windows. You use the same interactions in all variable windows to display, modify, and browse your variables and data structures. The only difference between these windows is the variables they display. The values in each window are updated as you trace through your program. The windows display the following information:
- Locals
- Contains the list of variables local to the current routine. Choose Locals from the Data menu to open this window.
- File Variables
- Contains a list of all variables defined at file scope in the current module. This includes external and static symbols. Choose File Variables from the Data menu to open this window.
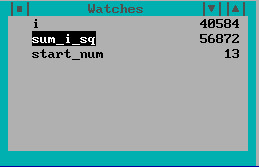
- Watches
- The Watches window allows you to add and delete variables and expressions. In other windows you can choose Watch. This opens the Watches window, and adds to it the text that's selected in another window. Use the New item in the context-sensitive or Action menu to add any expression to the Watches window. Once entered, you can choose Edit to edit the expressions or typecast the variables.
- Variable
- This is another instance of a Watches window. A variable window is created when you select a variable or expression in a window and use the Inspect command.
Each line of a variable window has three elements. On the left is a button. The button changes, depending on the type of the variable or expression:
- structs (classes) (unions)
- Structures may be opened and closed by clicking on the button at the left. When you open a structure or class, one line is added to the window for each field of the structure. These new lines are indented. If you click on the button again, the structure is closed, and the window is returned to its original state.
- arrays
- Like structures, arrays may be opened and closed. When you open an array, one line is added to the window for each element of the array. The debugger displays at most 1000 elements of an array. If it contains more, you can use the Type/Array... to open different ranges. Multi-dimensional arrays are treated like an array of arrays. When you open the first dimension, the lines that are added are also arrays that you can open.
- pointers
-
When the variable is a pointer, you can click on the button. The
debugger follows the pointer and changes the line to represent the
item that's the result of the pointer reference. For example, if you
have a pointer to an integer, and you click on the button, the integer
value
is displayed. The button then changes to indicate that you can undo
the operation by clicking on it again.
In the case of pointers to pointers, clicking on the button follows the pointers one level each time you click, until a non-pointer value is reached. Clicking on the button at this point takes you back to the original state. When the pointer points to a structure, it's automatically opened when you click on the button. If a pointer is really an array, you can use Type/Array... to open it as an array.
Next comes the name of the variable, field, or array element being displayed. Finally, the value is displayed. If the item being displayed isn't a scalar item, the value displayed is an indication that it's a complex data type. If the value changes when you run your program, it's highlighted. If a variable goes out of scope, or a pointer value becomes invalid, the value appears as question marks.
To modify a variable's value, double-click on the value field, or cursor to it and press Enter. Double-clicking or pressing Enter on the name field is equivalent to clicking on the button. Press the right mouse button to access the following popup menu items:
- Modify...
- Modify the value of the selected item.
- Inspect
- Open a new Variable window containing the selected item. If the item is a compound object (array, class, or structure), it's opened automatically.
- Break
- Set a breakpoint so that execution stops when the selected item's value changes. This is the same as setting a breakpoint on the object. See the Breakpoints chapter.
- Edit
- Open a dialog box in which you can edit an expression in the Watch window. This is useful for typecasting variables or evaluating expressions. See the Expression Handling chapter.
- New
- Add a new variable or expression to the window. You're prompted for the expression to add.
- Delete
- Delete the selected item from the window.
- Root
- When the selected item is a field of a structure or an element of an array, this menu item moves the currently selected item to the parent of that item. For example, if you are examining sym->field1->field2, Root changes the current selection to sym->field1. If you're examining a deeply nested field, use Root repeatedly to find the originating expression.
- Type/Hex
- Change the value to be displayed in hexadecimal.
- Type/Decimal
- Change the value to be displayed in decimal.
- Type/Character
- Change the value to be displayed as a single character constant. This is useful when you have a one-byte variable that really contains a character. The debugger often displays it as an integer by default.
- Type/String
- The debugger automatically detects pointers to strings in the variable windows and displays the string rather than the raw pointer value. If the string isn't null-terminated, contains non-printable characters, or isn't typed as a pointer to char, this mechanism doesn't work. Type/String overrides the automatic string detection and displays the pointer as a string regardless of its type.
- Type/Pointer
- This undoes the effects of Type/String or Type/Array. It also lets you see the raw pointer value when the debugger has automatically displayed a pointer to char as a string.
- Type/Array...
- Use this menu item to display a pointer as if it were an array, or to display ranges of an array's elements. You're prompted for the first and last element to display.
- Show/Raw Memory
- Display raw memory at the address of this variable. This lets you examine the actual binary representation of a variable.
- Show/Pointer Memory
- Display the memory that the item points to. This is useful when you have a pointer to a block of memory that doesn't have a type associated with it.
- Show/Pointer Code
- Display the code that the variable points to. If the item being displayed is a pointer to function, you can use this menu item to see the definition of that function.
- Options
- This menu contains the same options found in the section ``Variables Options'' in the Debugger Environment chapter. This menu item sets options on a per-window basis, overriding the global settings. When you use the menu item to change these settings, they aren't saved between debugging sessions. To change an option permanently, see the ``Window Options Dialog'' in the Debugger Environment chapter.
Memory and Stack windows
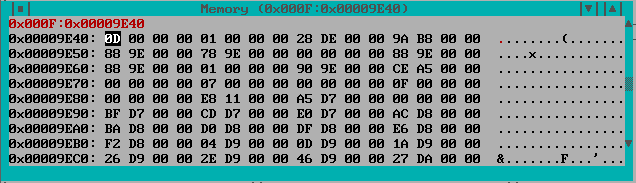
Use the Memory window or the Stack window to examine memory in raw form. To open a Memory window, choose Memory At from the Data menu. The Enter Memory Address dialog appears. Enter the memory address and press Return to see the Memory window. You can also use one of the Show/Pointer Memory or Show/Raw Memory items in a variable window to display the memory associated with a variable.
The Stack Window always shows the memory at the stack pointer. It moves to track the top of the stack as your program executes. The stack pointer location is at the top of the window. The location of the BP or EBP register is also indicated. Choose Stack from the Data menu to open the Stack window.
To modify memory, double-click on a value in the Memory or Stack window, or cursor to it and press Enter. You're prompted for a new value.
Memory windows allow you to follow data structures in the absence of debugging information. The Follow menu items reposition the memory window to the address that's found under the cursor. The Repeat and Previous items let you repeat a follow action. This makes it simple to follow linked lists. Press the right mouse button to access these popup menu items:
- Modify
- Modify the value at the selected address. You're prompted for a new value. You should enter the value in the radix that the window's currently displaying. You aren't limited to typing constant values - you can enter an arbitrary expression to be used for the new value.
- Break on Write
- Set a breakpoint to stop execution when the selected value changes. See the chapter Breakpoints.
- Near Follow
- Display the memory that the selected memory points to, treating it as a near pointer. The new offset to be displayed is xxxx, where xxxx is the word under the cursor. DGROUP is used as the segment if it can be located. The program's initial stack segment is used otherwise. When you're debugging a 16-bit or 32-bit application, the appropriate word size is used.
- Far Follow
- Displays the memory that the selected memory points to, treating it as a far pointer. The new address to be displayed is the the segment and offset found at the cursor location. Note that pointers are stored in memory with the offset value first and the segment value second.
- Segment Follow
- Display the segment that the selected memory points to, treating it as a segment selector. The new address to be displayed is xxxx:0, where xxxx is the two-byte word under the cursor.
- Cursor Follow
- Make the selected position the new starting address in the window. This means that the first byte in the memory window becomes the byte that the cursor was pointing to. This is useful for navigating through an array when no debugging information is available.
- Repeat
- Repeat the previous Follow operation. The new address that's used is at the same offset relative to the beginning of the window as it was in the original Follow operation. Repeating a pointer or segment follow is a linked list traversal. Repeating a Cursor Follow operation advances to the next element in an array.
- Previous
- Back out of a Follow or Repeat operation. This displays the memory window you were previously viewing. Essentially, this undoes a Follow operation. You can back all the way out to the first memory location you were examining.
- Home
- Undo all Follow and Repeat operations. This takes you back to the very first location window you were examining. It's equivalent to using Previous repeatedly.
- Left
- Scroll the window backward through memory by the size of the displayed memory items.
- Right
- Scroll the window forward through memory by the size of the displayed memory items.
- Address
-
Position the window at a new address. You're prompted to type in
a new address. You can type an arbitrary expression.
Expressions are discussed in the chapter
Expression Handling.
If you type the name of a variable, the address of that variable is used. If the expression you type doesn't contain a segment value, DGROUP is used as the segment if it can be located. The program's initial stack segment is used otherwise.
- Assembly
- Position the assembly window to the address of the memory under the cursor. This is useful if you have incorrectly displayed a pointer as data and wish to look at the code instead.
- Type/Byte
- Display as hexadecimal bytes.
- Type/Word
- Display as hexadecimal 16-bit words.
- Type/Dword
- Display as hexadecimal 32-bit words.
- Type/Char
- Display as signed 8-bit integers.
- Type/Short
- Display as signed 16-bit integers.
- Type/Long
- Display as signed 32-bit integers.
- Type/Unsigned Char
- Display as unsigned 8-bit integers.
- Type/Unsigned Short
- Display as unsigned 16-bit integers.
- Type/Unsigned Long
- Display as unsigned 32-bit integers.
- Type/16:16 Pointer
- Display as 32-bit far pointers (16-bit segment, 16-bit offset).
- Type/16:32 Pointer
- Display as 48-bit far pointers (16-bit segment, 32-bit offset).
- Type/Binary
- Display as binary 8-bit words
- Type/Float
- Display as 32-bit floating-point values.
- Type/Double
- Display as 64-bit floating-point values.
Following linked lists
Use the memory window to display the memory address of the first node of your linked list. Move to the ``next'' field of your structure and use the Near (or Far) Follow command. The next node of your linked list is displayed. Now by using the Repeat command you can traverse the linked list.
Traversing arrays
Display the memory address of your array. Select the first byte of the second element of your array, then use the Cursor Follow command to move the second element of your array to the beginning of the memory window. By using the Repeat command you can traverse your array.